How To Navigate View Coupon ?
- Login to the iThink Logistics Panel and fill in the username and password
- The user will be redirected to the dashboard.
- Click on the top menu. The user can see the Hamburg menu icon. The user can see domestic, international, and Connect+ products by clicking that. Now click on ITL Connect+.
- In the Connect+ option, Click on the Coupon Option.
- The user will be redirected to the View Coupon page
How To Add Coupon
The following is the screen where you can add the coupon for your customers. You can add the coupon in the following way.
- Click on Add Coupon, and the user will be sent to Add Coupon.
- Enter the Coupon Name
- Select Coupon Type Flat or Discount. The user can select any one of them.
If the user selects Flat, the discount amount will be displayed, and the user will fill in other details. The coupon banner image should be JPG, JPEG, or PNG, not over 2 MB. Fill in all details that are marked with an asterisk.
- The discount percentage will be displayed if the user selects the discount type. Fill in other details and add the coupon banner image. It should be a JPG, JPEG, or PNG image, no more than 2 MB. Fill in all details, which is an asterisk mark.
- After clicking the add button, the user can see the added coupon details. If the user wants to cancel, they can click the cancel button.
How To Filter Coupon Table ?
The Following is the coupon details screen. You can view all the active/ inactive coupons and add new ones.
Coupon view
You can view the coupon widgets, which have an overview of the following named widgets.
- All Coupons: The number of count of all coupons
- Orders on which coupon applied: Number of orders count on which the coupon applied
- Orders Converted to Prepaid: Number of orders count on which the coupon used to convert it to prepaid
- Order on which no coupon applied: Number of orders on which the coupon is not applied.
Search and filter
- Search: Here, users can search any specific coupon name
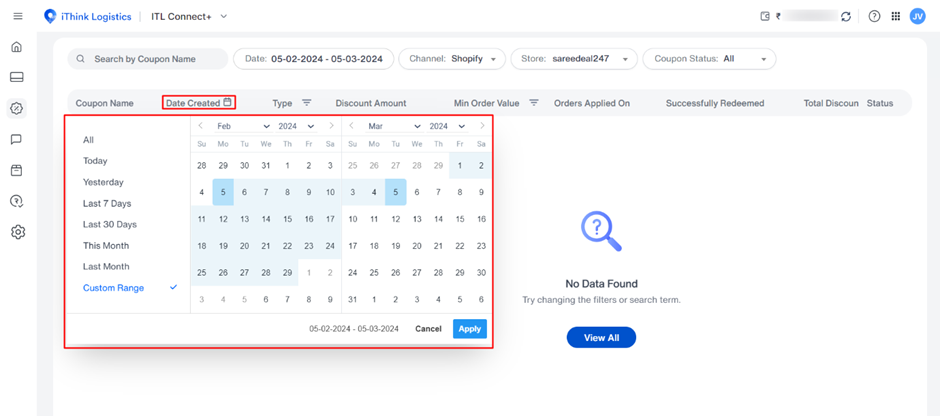
- Date: Filter your order as per your date, select the date and filter the order according to the date. A multiple-date option is given on the list, and the user can select one option by selecting the custom option. The user can select a date according to the choice
- Channel Filter: The user can select the channel from the drop-down or Filter Out channel depending on channel selection. The store list will be visible.
- Store Filter: The user can select Store from the drop-down list. A drop-down menu will appear, and users can filter coupons by their status by clicking on the coupon status filter.
Following are the details available in the coupon table
- Coupon name: Name of the coupon you set during coupon creation. You can search for the name of the coupon and filter the coupon from the list.
- Date Created: Coupon creation date. Select the date and filter the coupon according to the date.

- Coupon type: Select the type of coupon, whether a flat or discount coupon. Then, filter the result based on the selected coupon type.
- Discount Amount: Coupon with the discounted amount. Filter the coupon data based on the discount coupon amount.
- Min order value: Click on the min order value, and a filter popup will appear where the user can enter the min amount and max amount to filter by order value.
- Orders applied on: Total count of orders where the coupon is applied
- Successfully redeemed: Total count where the coupon is successfully redeemed.
- Total Discount: The total discounted amount can be viewed.
- Total Revenue: Total revenue from those orders. Filter the revenue amount to view the coupon lists.
- Orders: Action button for the order for which you can view the details for which order the selected coupon is redeemed
On clicking the view coupon, a popup will appear with order details, showing the following pop-up.
The following details are related to the coupons in the popup: coupon name, coupon type, discount amount, minimum order value, and maximum order value with the status.
- Coupon history with the coupon's last used date.
- You can also check your coupon preview to see how it looks
- You can change the pagination of the page by selecting the page number
- You can select the number of columns you want to view in one go.
- Status: You can view the status, i.e. Active/ Inactive
