What is NDR Escalation?
The NDR escalation allows you to get real-time updates about your non-delivered orders so that you can take immediate action. This reduces RTO and increases brand loyalty.
How do you navigate to NDR escalation?
- Enter the credentials on the Login Page.
- Click on Login.
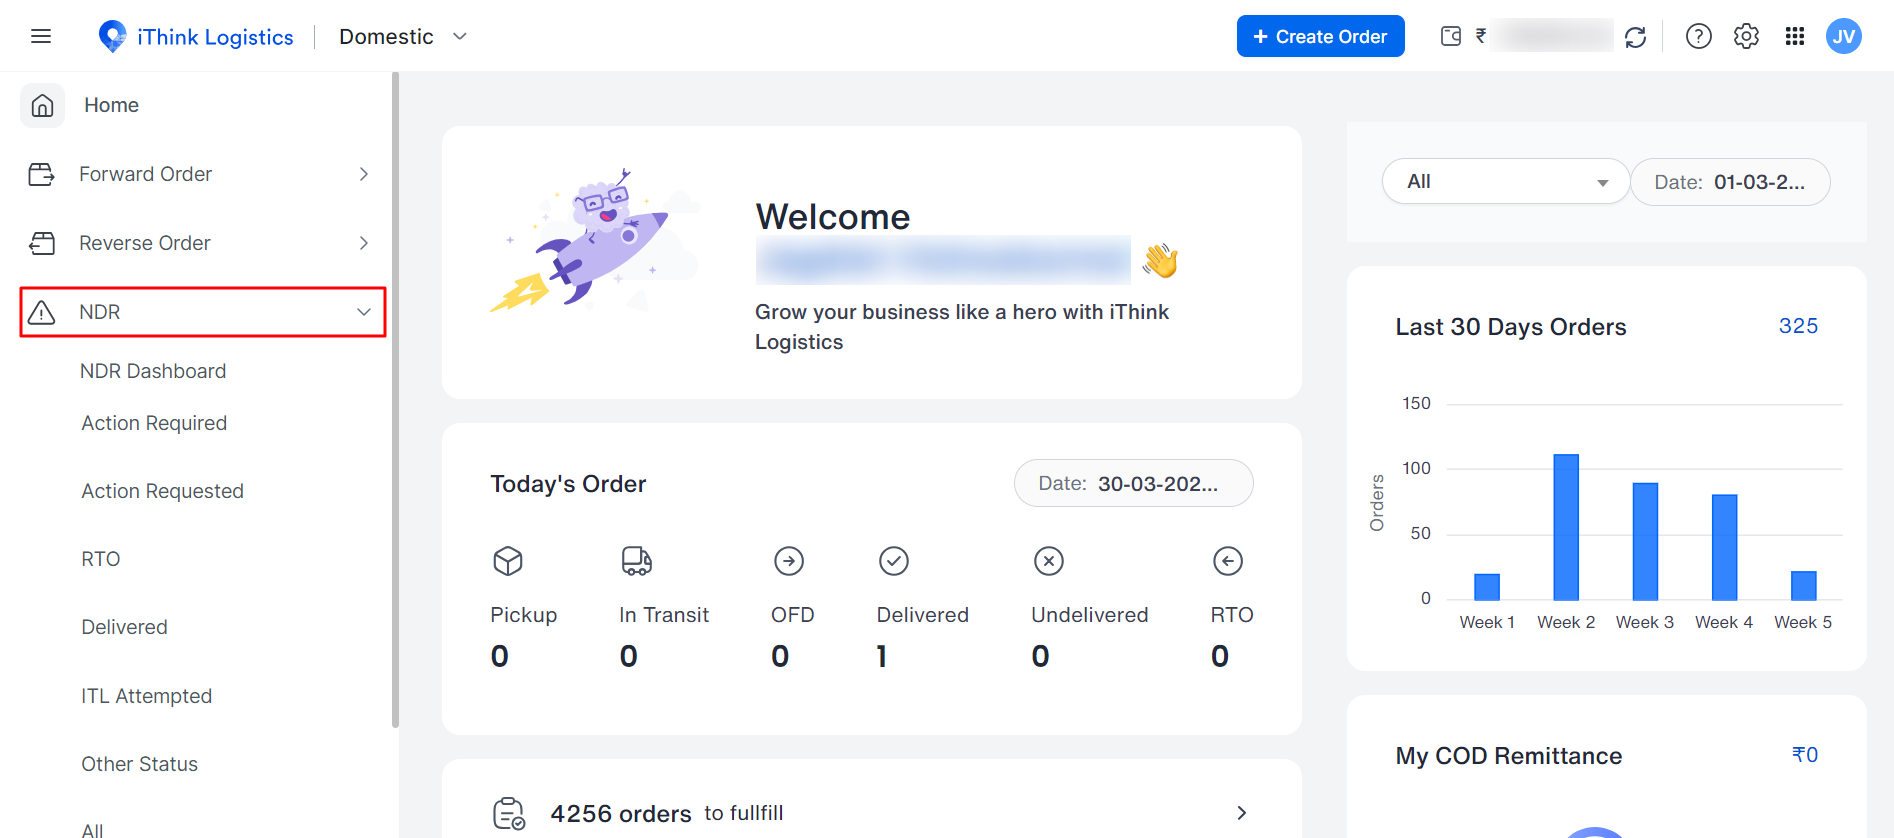
- After successfully logging in, you can view the iThink dashboard on the screen.
- You can see a menu bar on the dashboard at the top left corner.
- Click on the menu bar, and a drop-down will appear.
- Now click on the NDR [Non-Delivery Report]
How many Tabs are there in the Table?
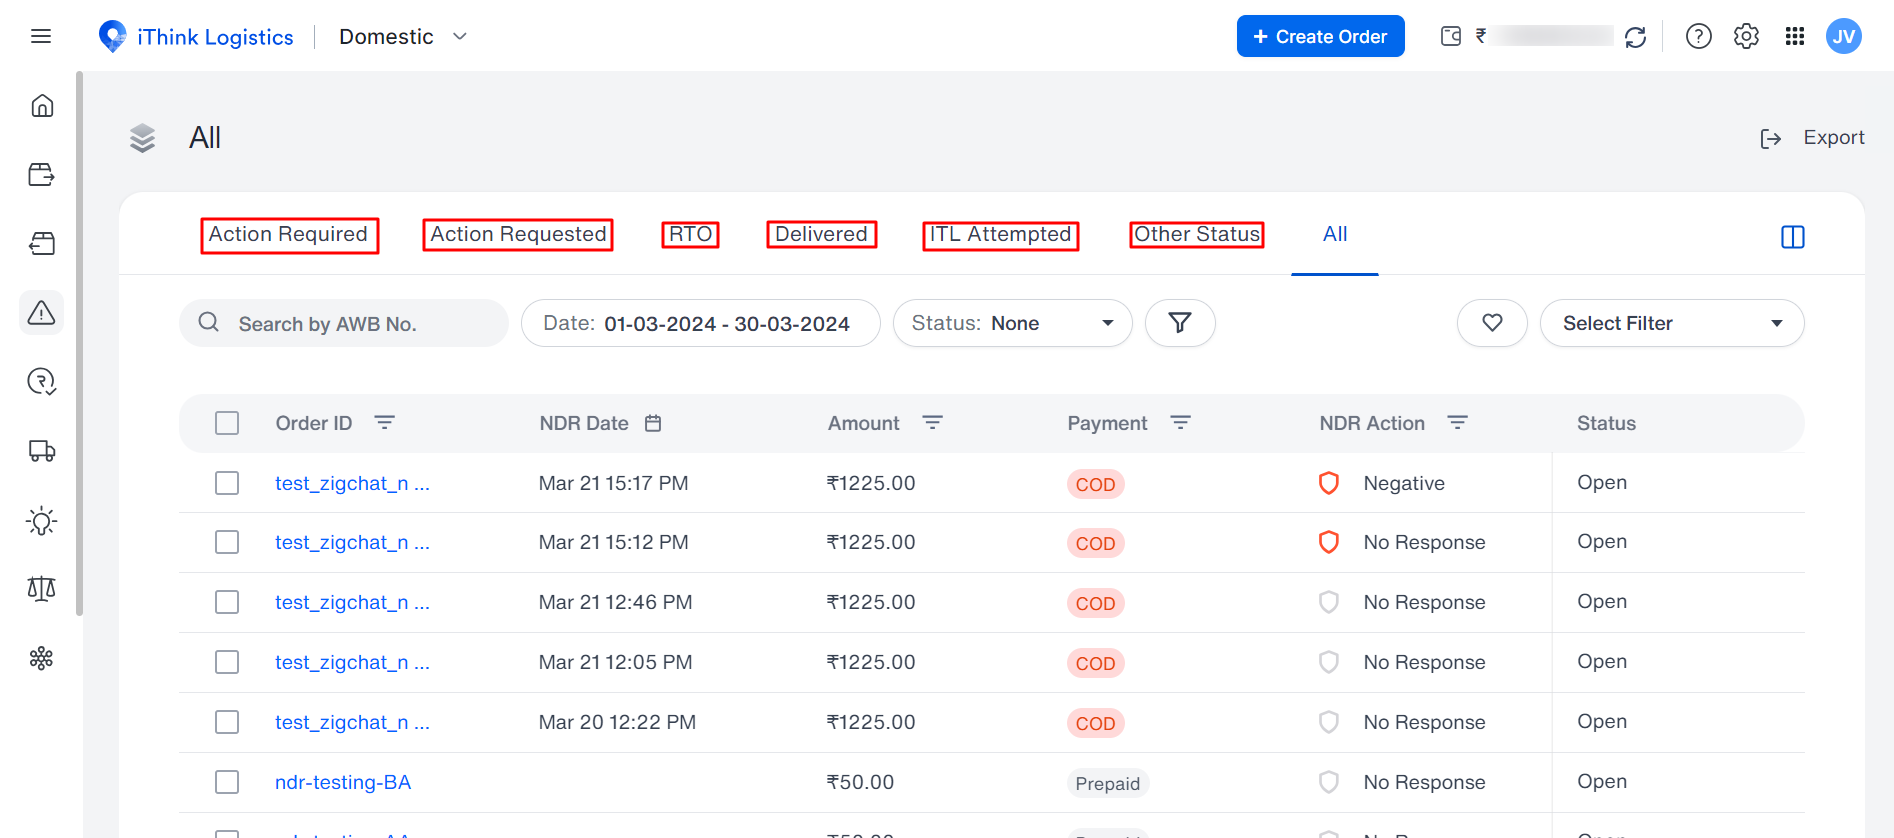
The Table has been divided into 5 tabs, as shown below:
- Action Required
Where you need to take the necessary action against the undelivered order. - Action Requested
The actions already taken will be on the NDR table list. - RTO
The orders are returned to the origin from the customer's end. - Delivered
The non-delivered order is delivered to the customer’s address after the action is requested. - All
This consists of all the orders. You can search the order based on order ID or AWB no and quickly check their order status. - iThink Logistics Attempted
iThink Logistics has taken action for the particular orders. - Others Status
Over sellers can see other different statuses.
Note: If you don't act against your order, the shipment will be automatically labelled for RTO by the courier partner.
What are the standard filters in the Table?
The Table has various filters. Let’s see and understand them one by one.
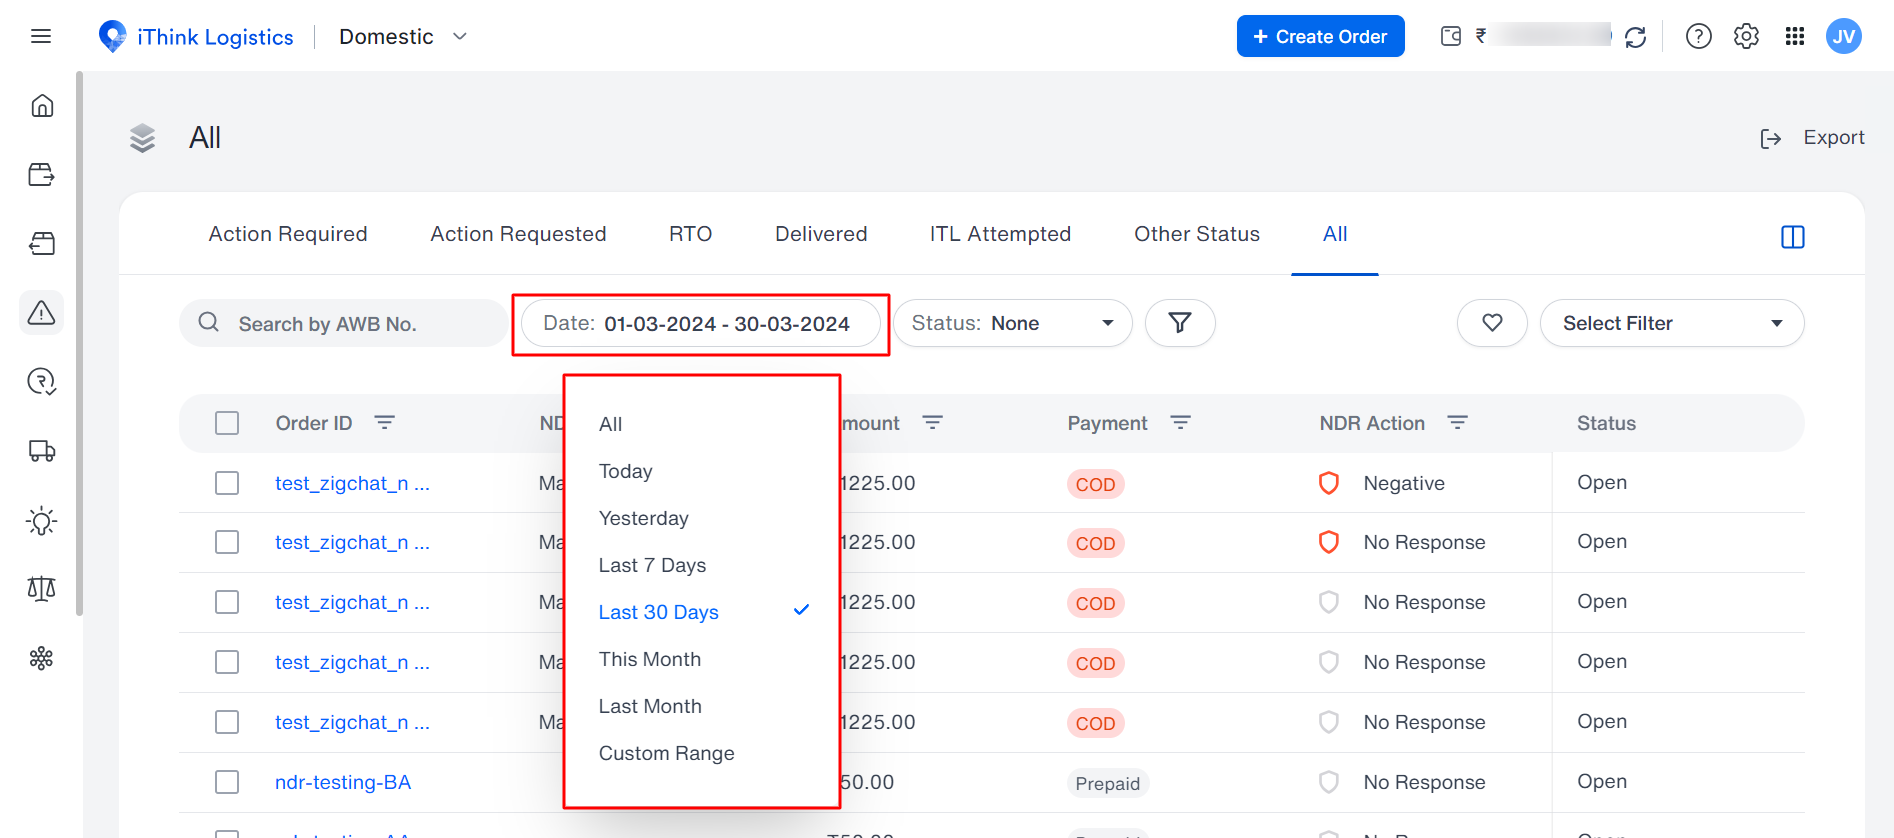
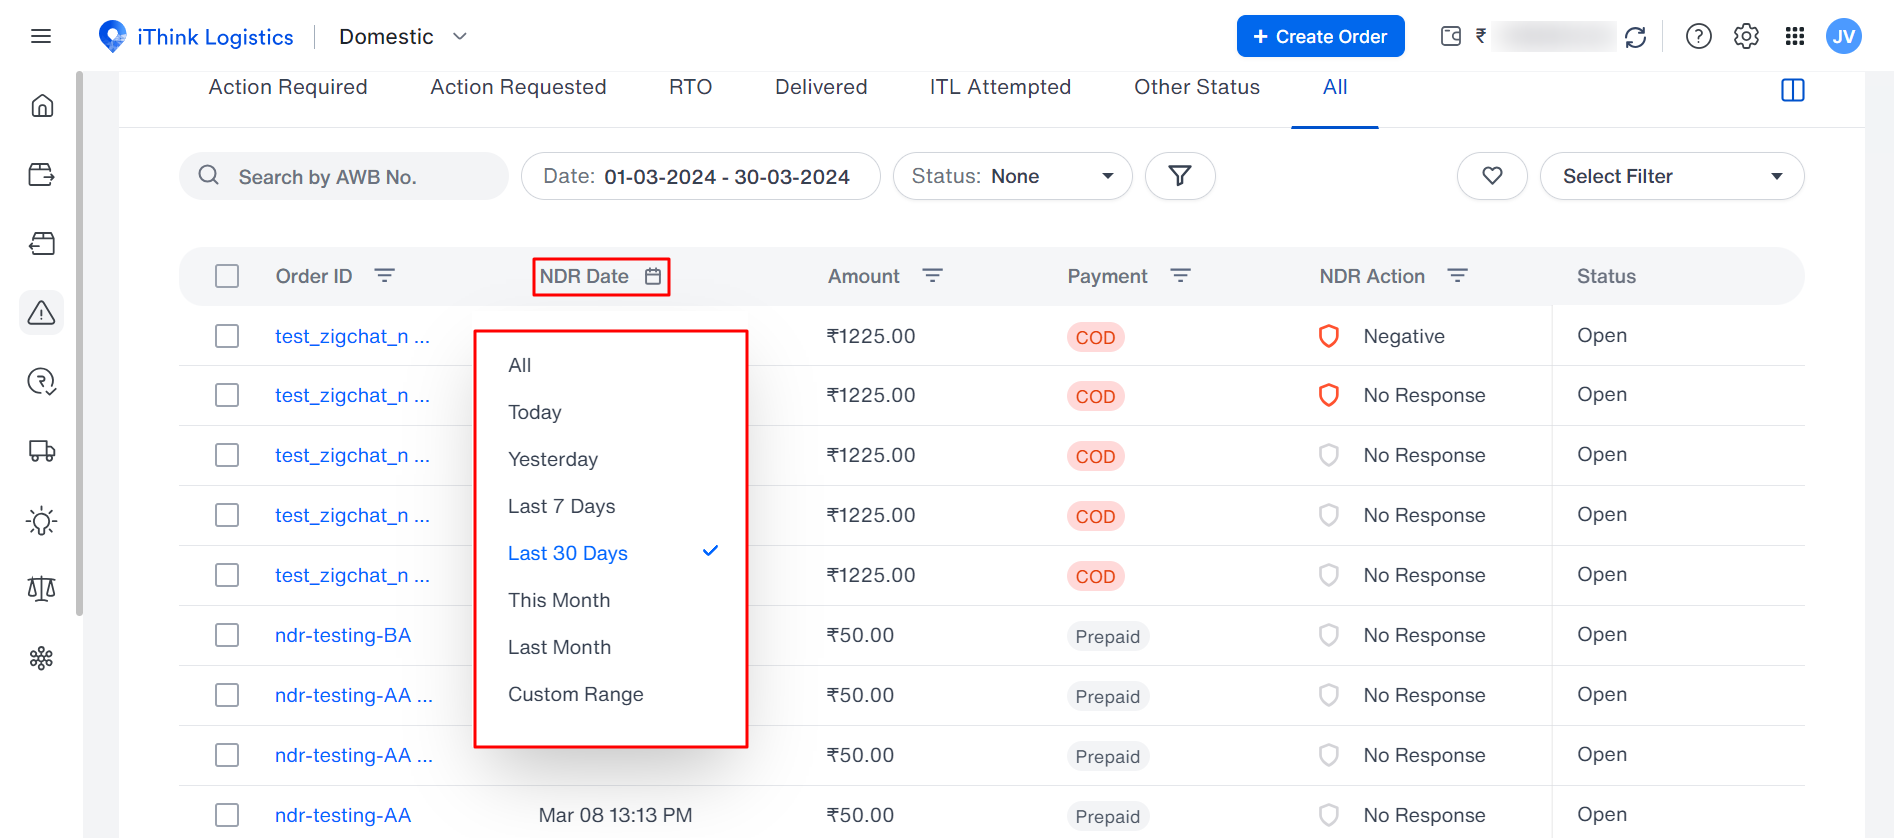
- Date filter: Click on the Date filter. After you click, a pop-up or calendar will appear. The date pop-up can consist of today, yesterday, last 7 days, Last 30 days, this month, last month, and custom-wise dates. You can select any dates or days accordingly and filter the data. You can also add the dates manually.
- Search order ID: By clicking the Search Order ID, you can search your shipments by order ID or AWB number.

Let’s move on to the Column filters and learn about them.
Note: The following are the table columns shown in the image. Each table field has a filter, so you can filter the table columns according to the available filter and data.
What are the Column filters?
- Order Id: The Order IDs you see in this column are auto-generated. You can see the Order ID for every product and search for a particular order ID by clicking on the filter. Once you click on the filter, a pop-up will appear. Then, you need to type a specific order ID and click apply. If you want to reset the filter, you must click the reset button.
- NDR date: The NDR date column shows the date the order was marked as not delivered for any reason. This can be used to filter the orders date-wise. You need to select the filter, and then a pop-up appears. After that, you need to select either today, yesterday, last 7 days, last 30 days, this month, or last month and click on Apply to filter the data. Custom-wise dates can also be selected so that you can add the dates manually according to your requirements. If you want to cancel the filter, click the cancel button.
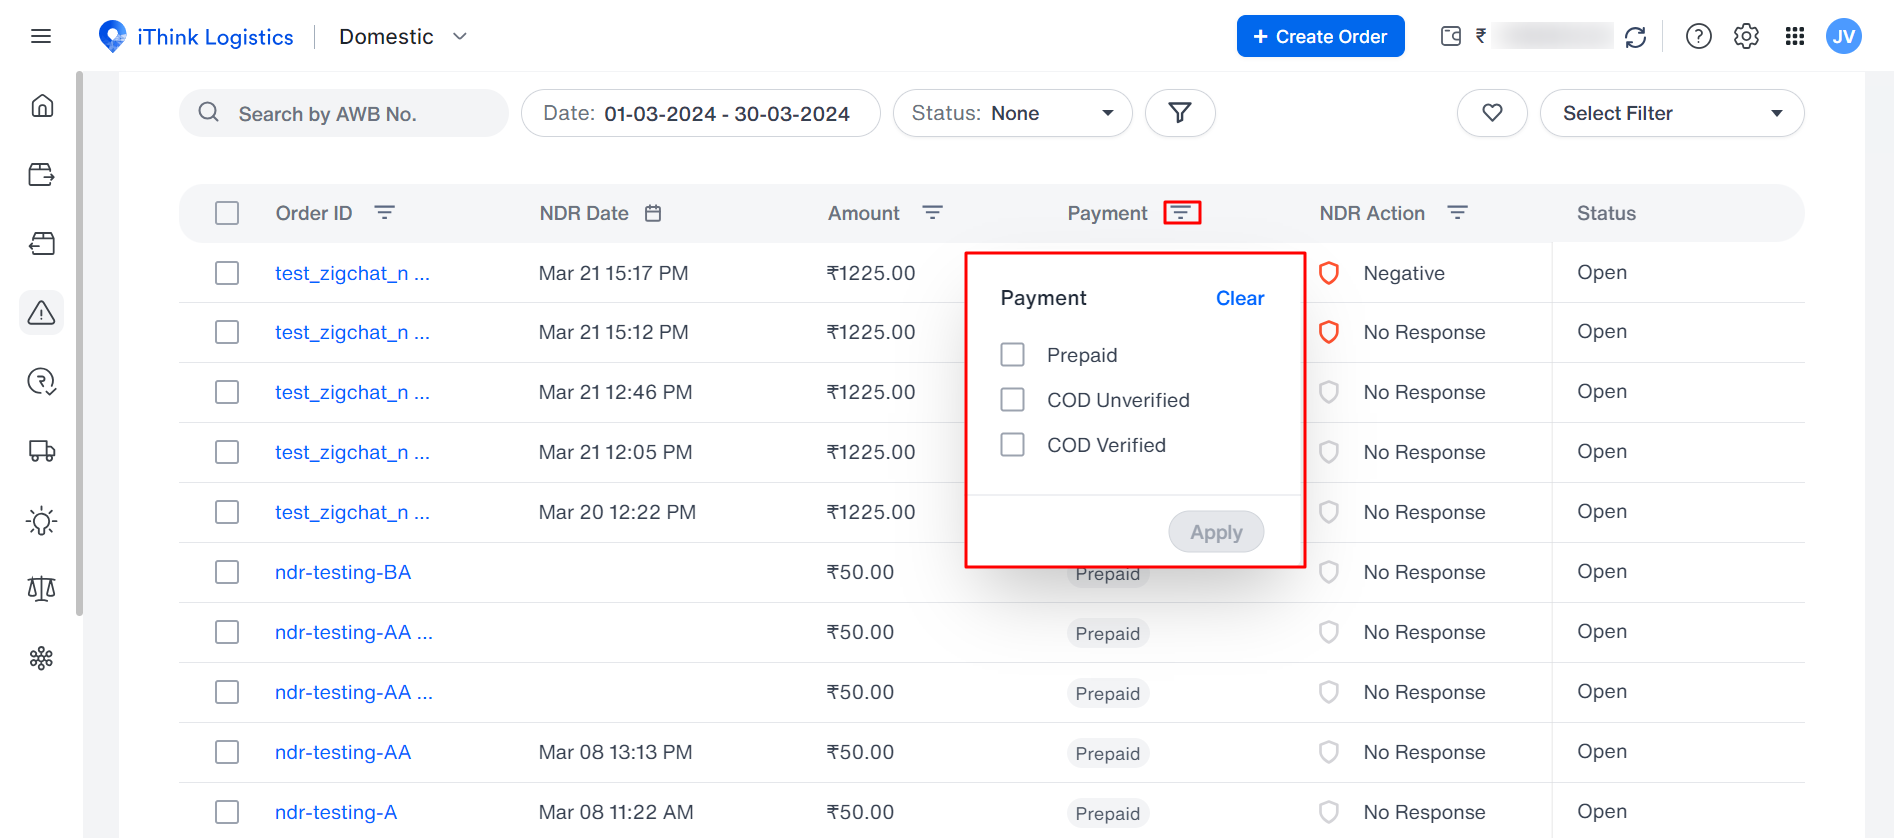
- Payment Details: You can filter your order through payment modes, like COD and prepaid. Click on the filter, and a pop-up will appear. Select the Cod or Prepaid checkbox and click on Apply. If you want to reset the filter, click on the reset button.
- Customer details: Customer Column details consist of the customer's name, email address and mobile number. All these fields, such as name, email address, and number, can be used as a filter to find the particular order you’re looking for. Click on the Customer Details Filter, and a pop-up will appear. Then, type Name, Email, or Mobile Number, and click Apply. The Data will be filtered accordingly. If you want to Reset the Filter, you need to click on the Reset Button.

- Shipping (AWB): Shipping column details include logistics name, AWB number and warehouse address. You can filter the data by shipping service as well. You need to click the Shipping Details Filter, and a pop-up will appear. Then, you need to click on any logistics you want to filter your data. After that, click on the Apply Button.

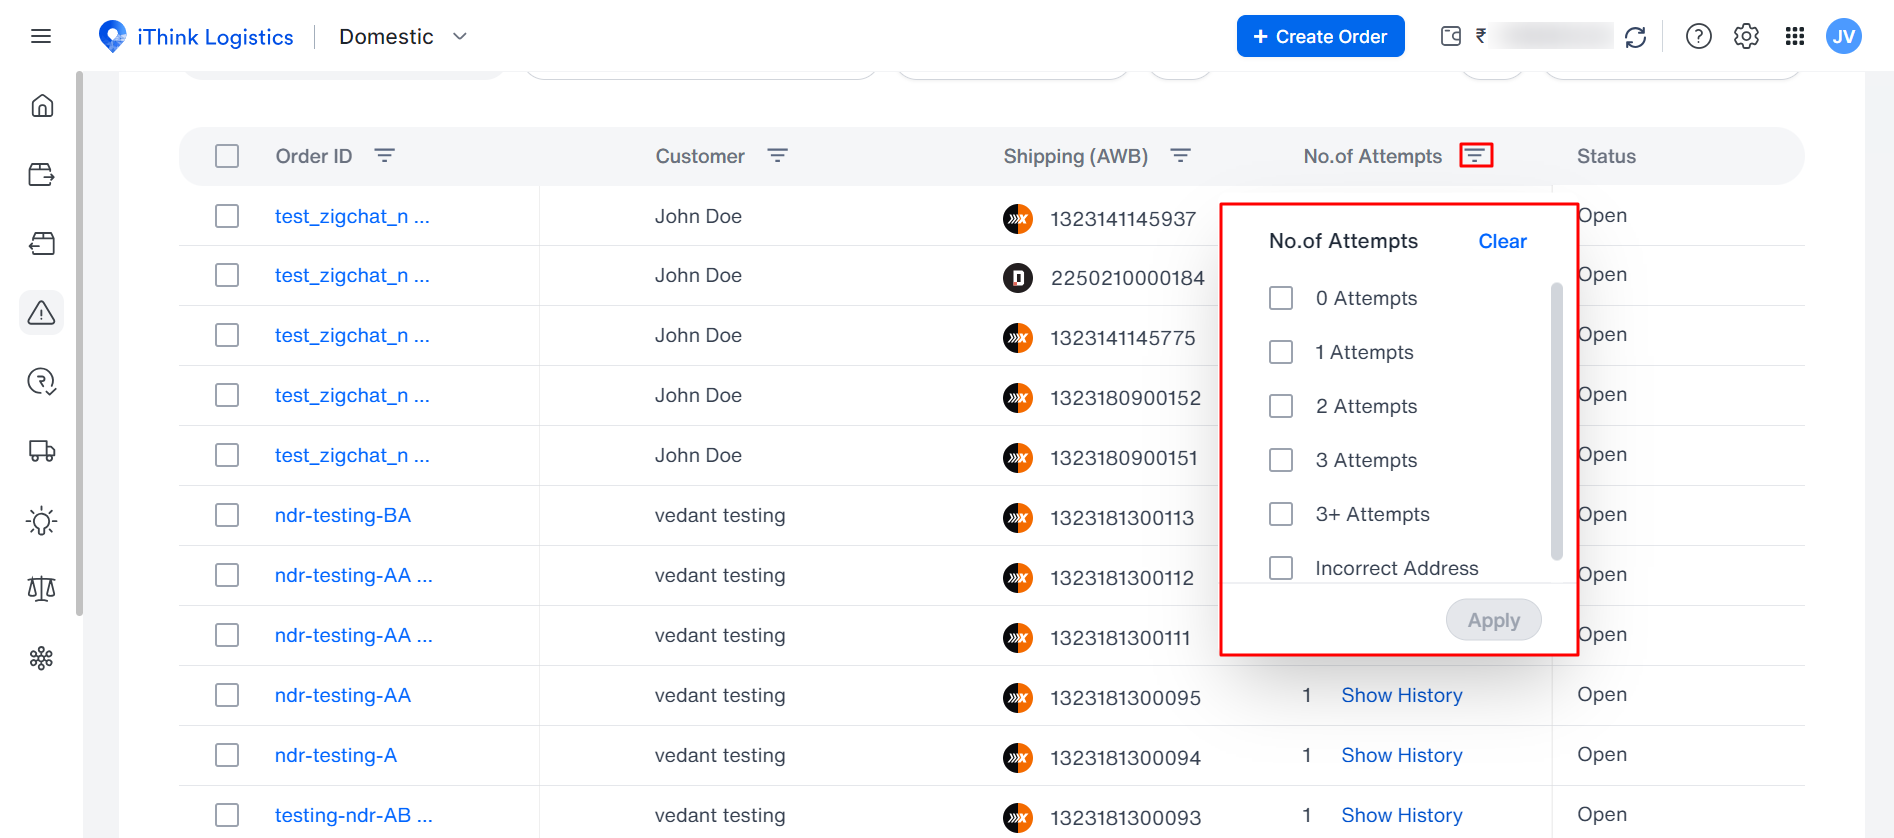
- Attempt count: You can view the attempts completed against the order by clicking on the show history option. This option allows you to review the complete journey of the parcel.
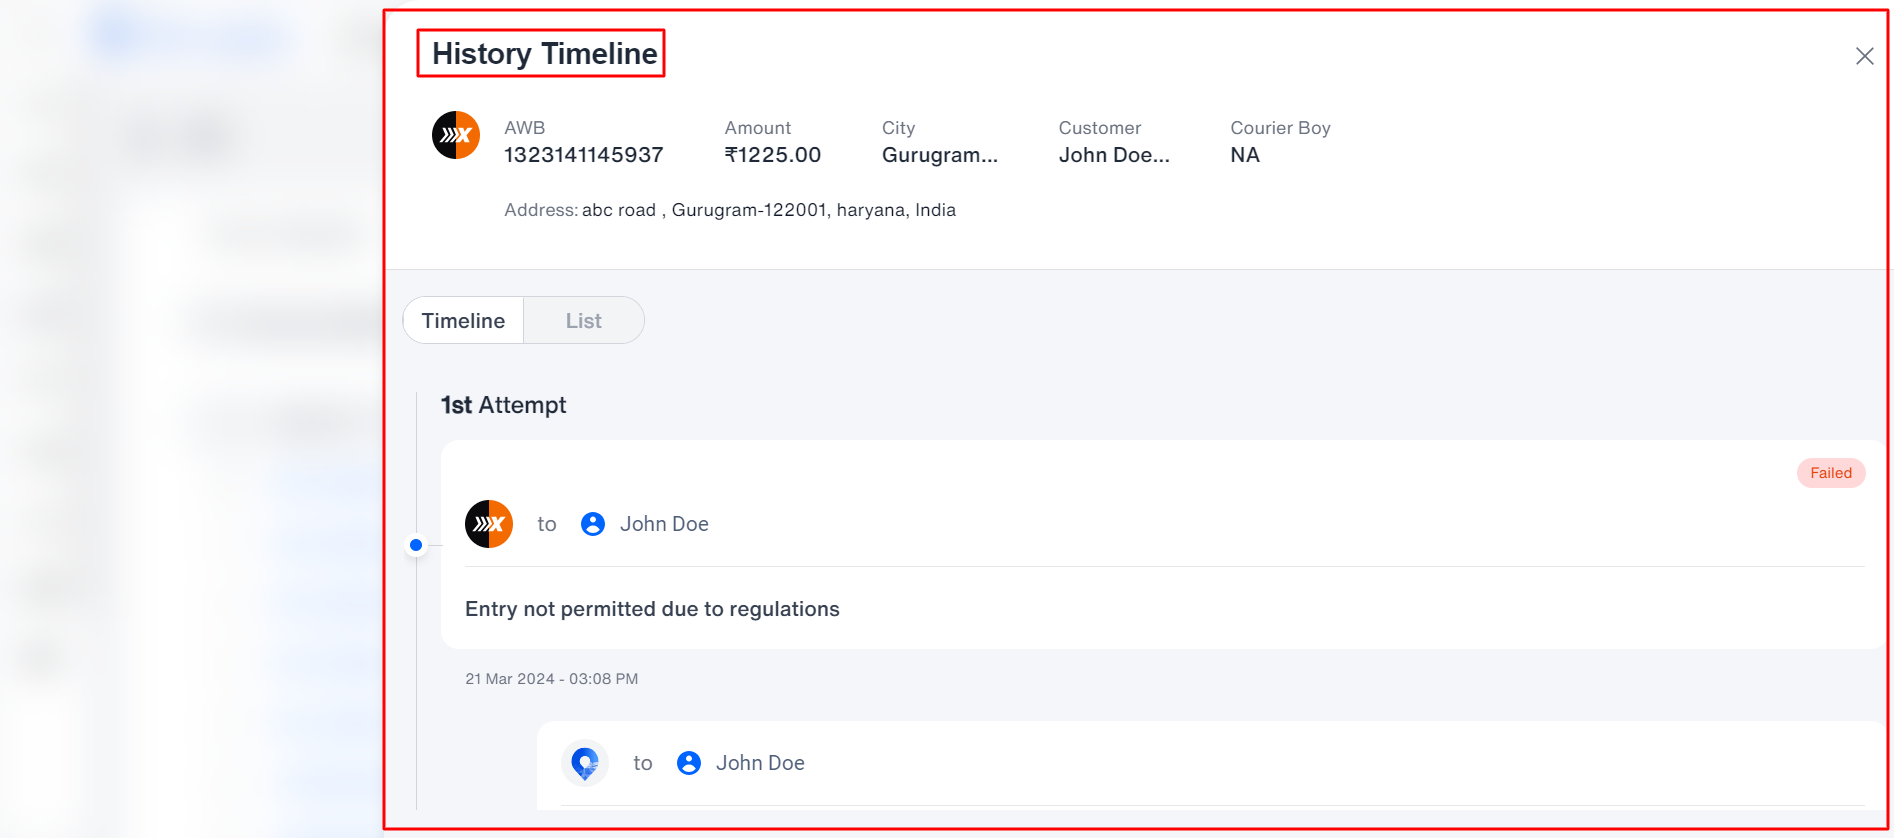
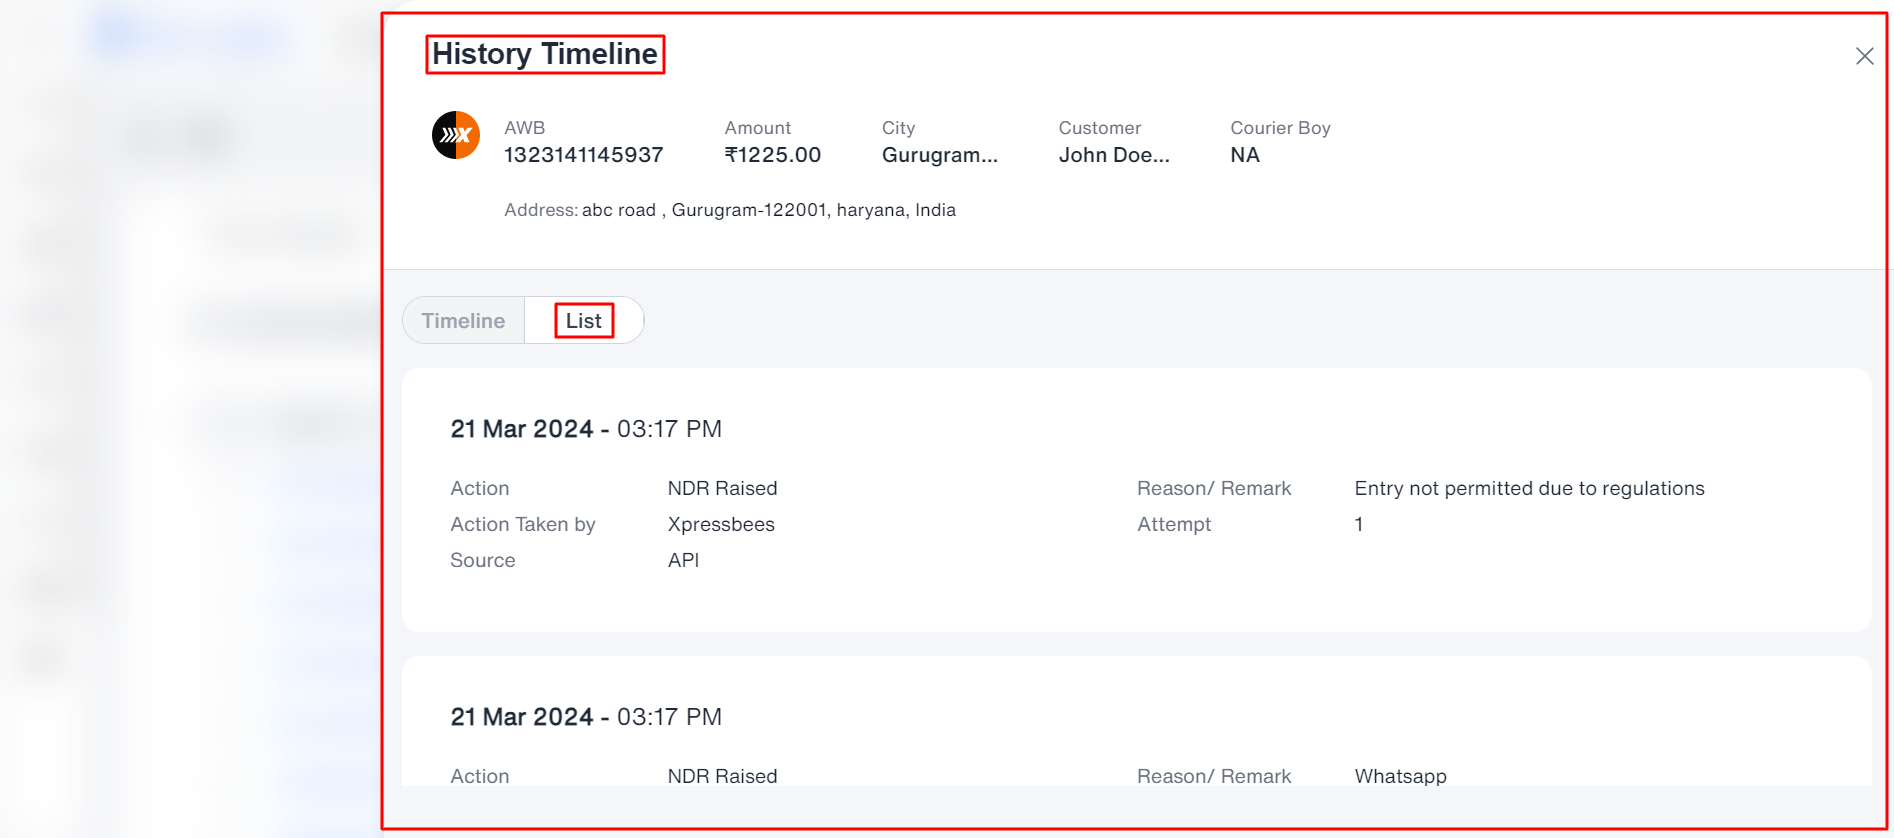
On click of show history, the following screen will be displayed, where you can check the entire journey of the parcel in the timeline and list view.
Courier service to the customer, attempt to count with the remark of whether a call has been received or the reason for the undelivered of an order can be seen.
The exact order will go under the non-delivered, where you or ithink the logistics team will follow up.
Note: If ithink logistics or the seller has followed up with the customer, either in any way, by call, WhatsApp or SMS, the same data will be stored in the timeline records along with the date and time of capture.
- Timeline view: This is a simple flow where you can check the parcel's journey, starting from the first attempt.
- List view: A simple flow based on the attempts with the date and time
In the list view, you can view Actions raised by a person, Reason/remark, Actions taken by courier service, Attempts, Future delivery date, if any, Sources, updated address, Updated phone number, if there is any, and proof of recording.
- Action Taken: It will consist of action taken, whether a reattempt or by the remark.
- Escalation Status: In the Table, you can see the button as escalation, based on whether or not you can take the necessary action against the order.
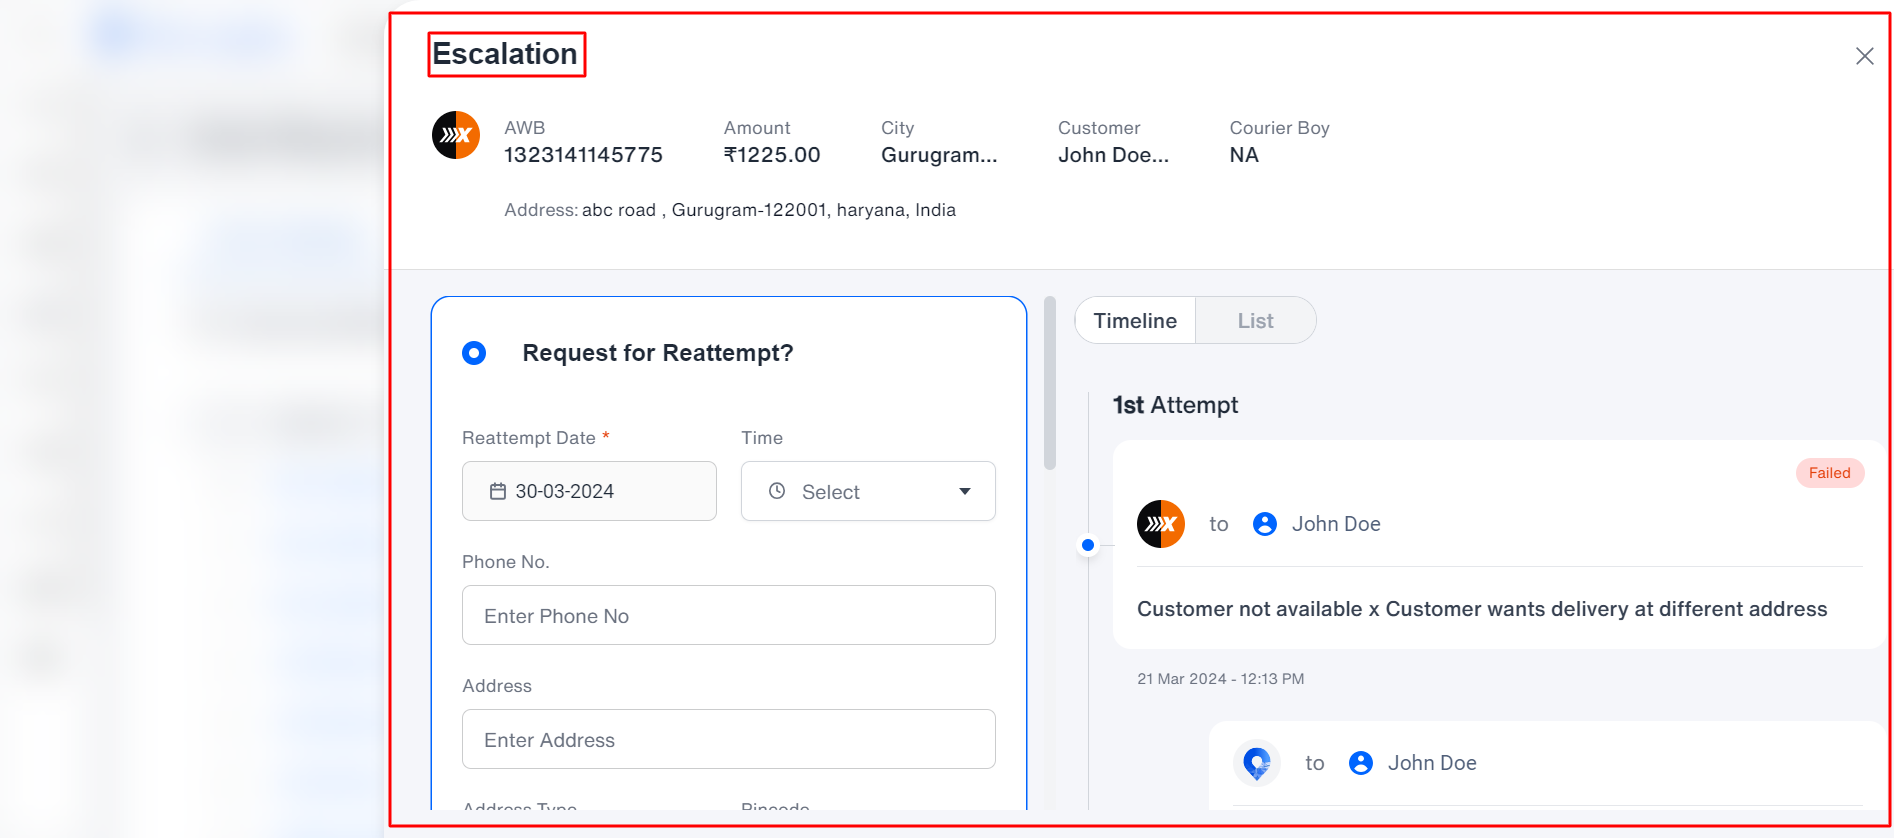
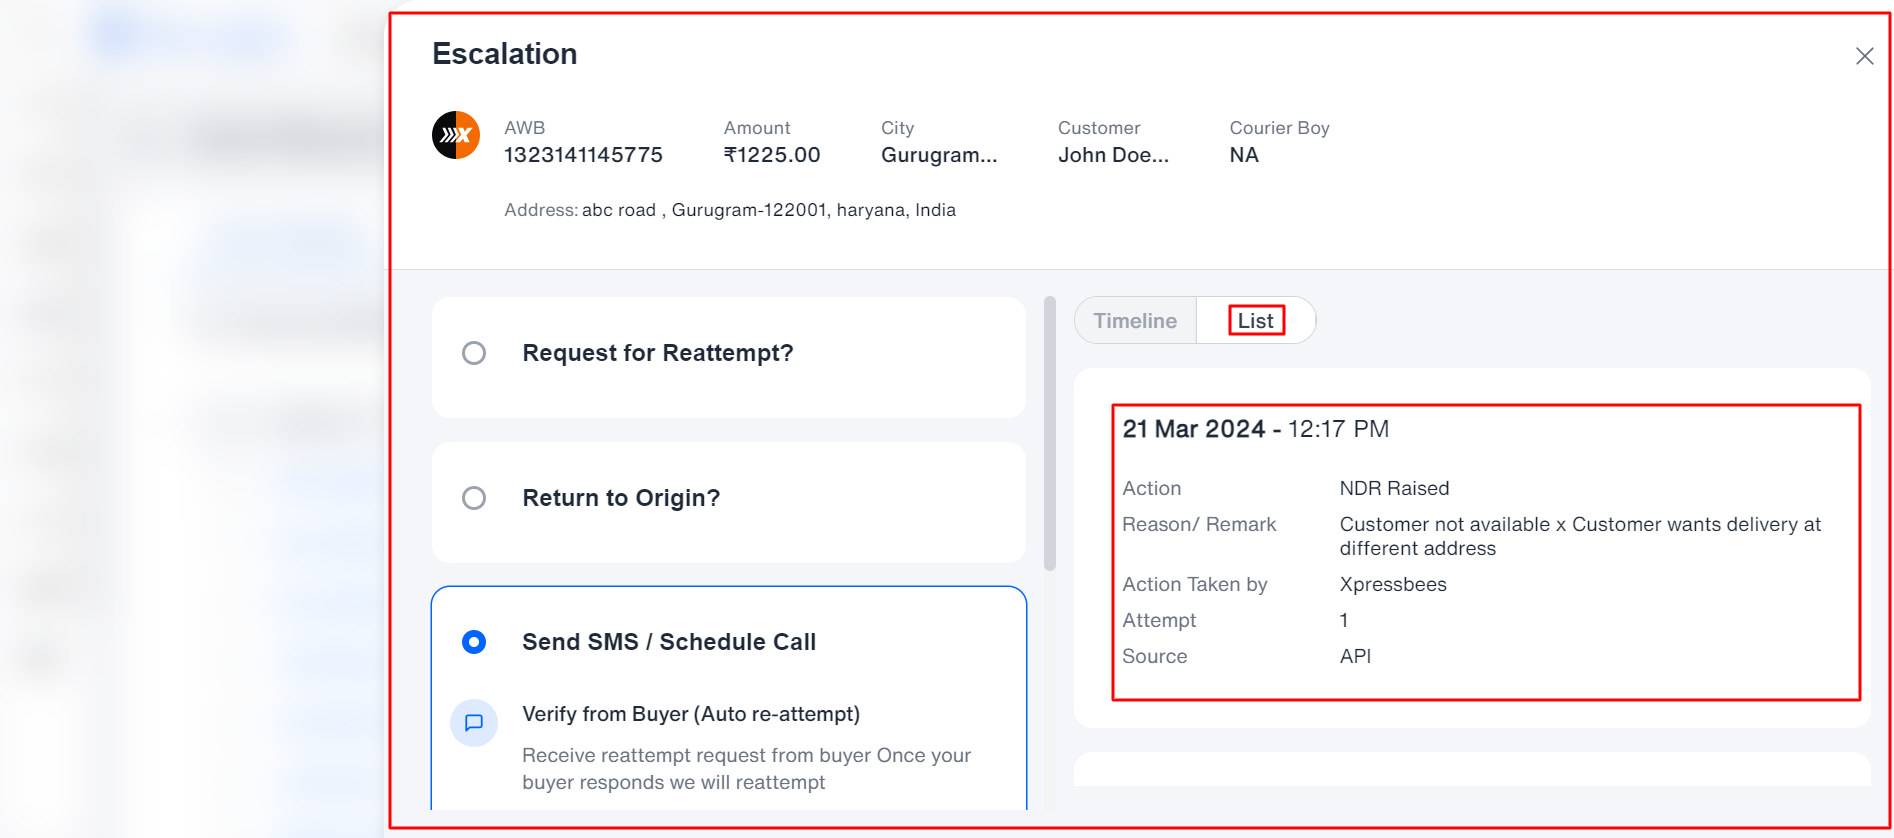
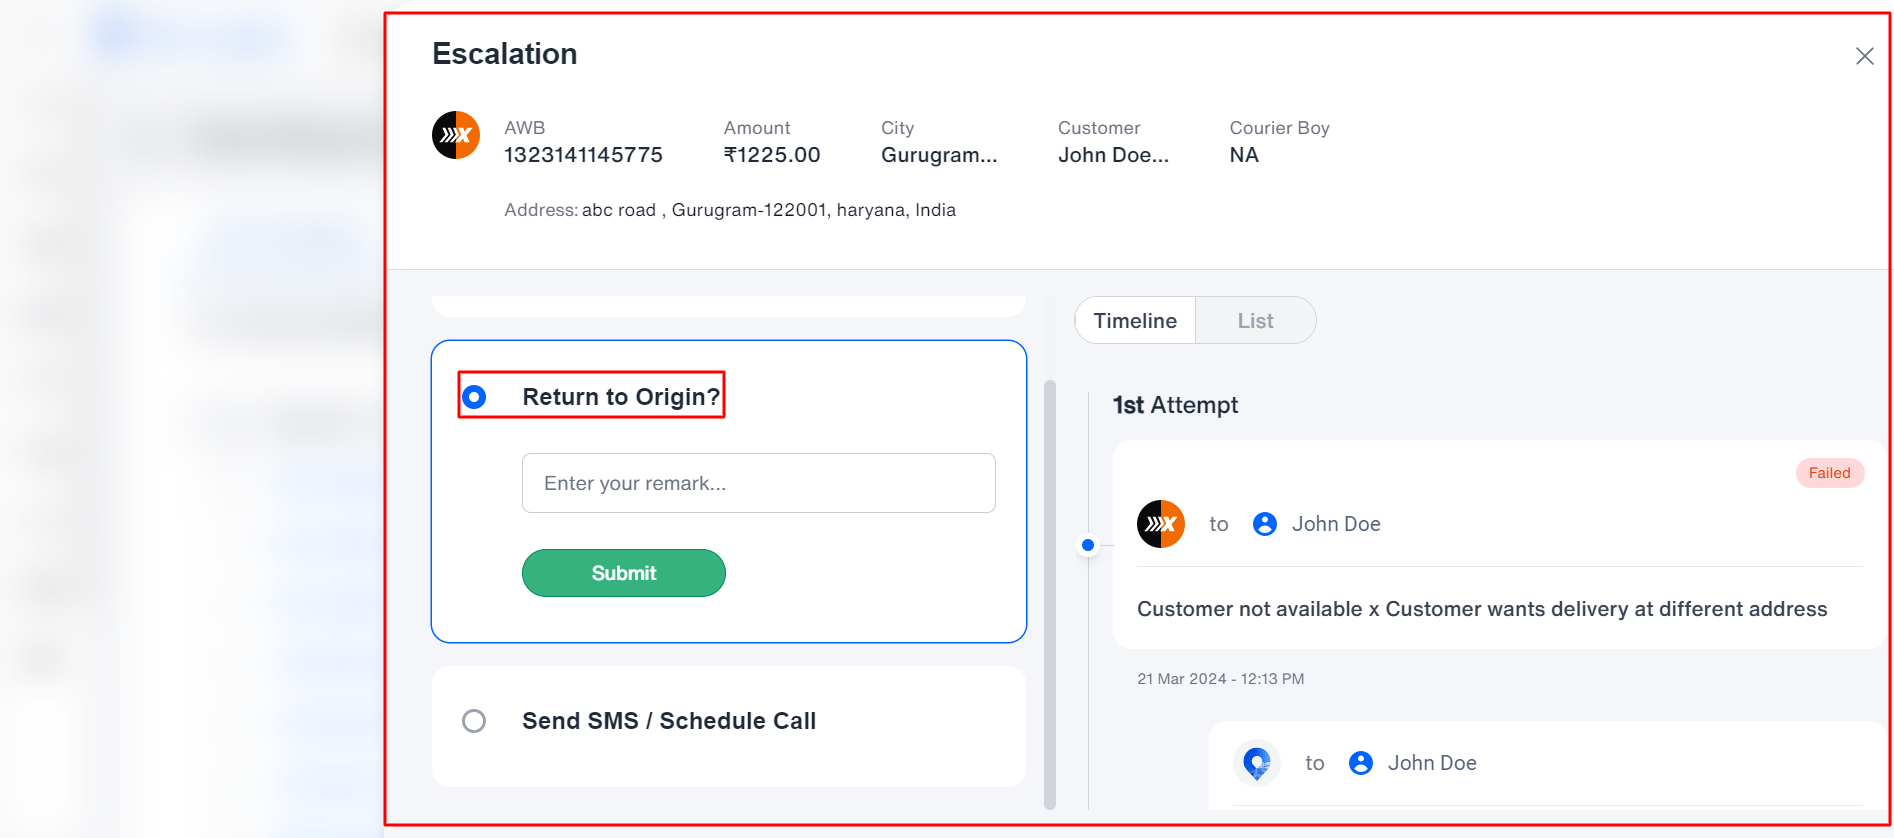
With one click of the escalation button, a pop-up appears, as shown in the image below. The pop-up has details in the header, such as AWB and current status, with the date and time.
The modal pop-up has three options, i.e. Request to reattempt, RTO, and Send SMS/Schedule call, as shown in the image below.
- Request to attempt: When you click the Request for Reattempt option, you can request a reattempt.
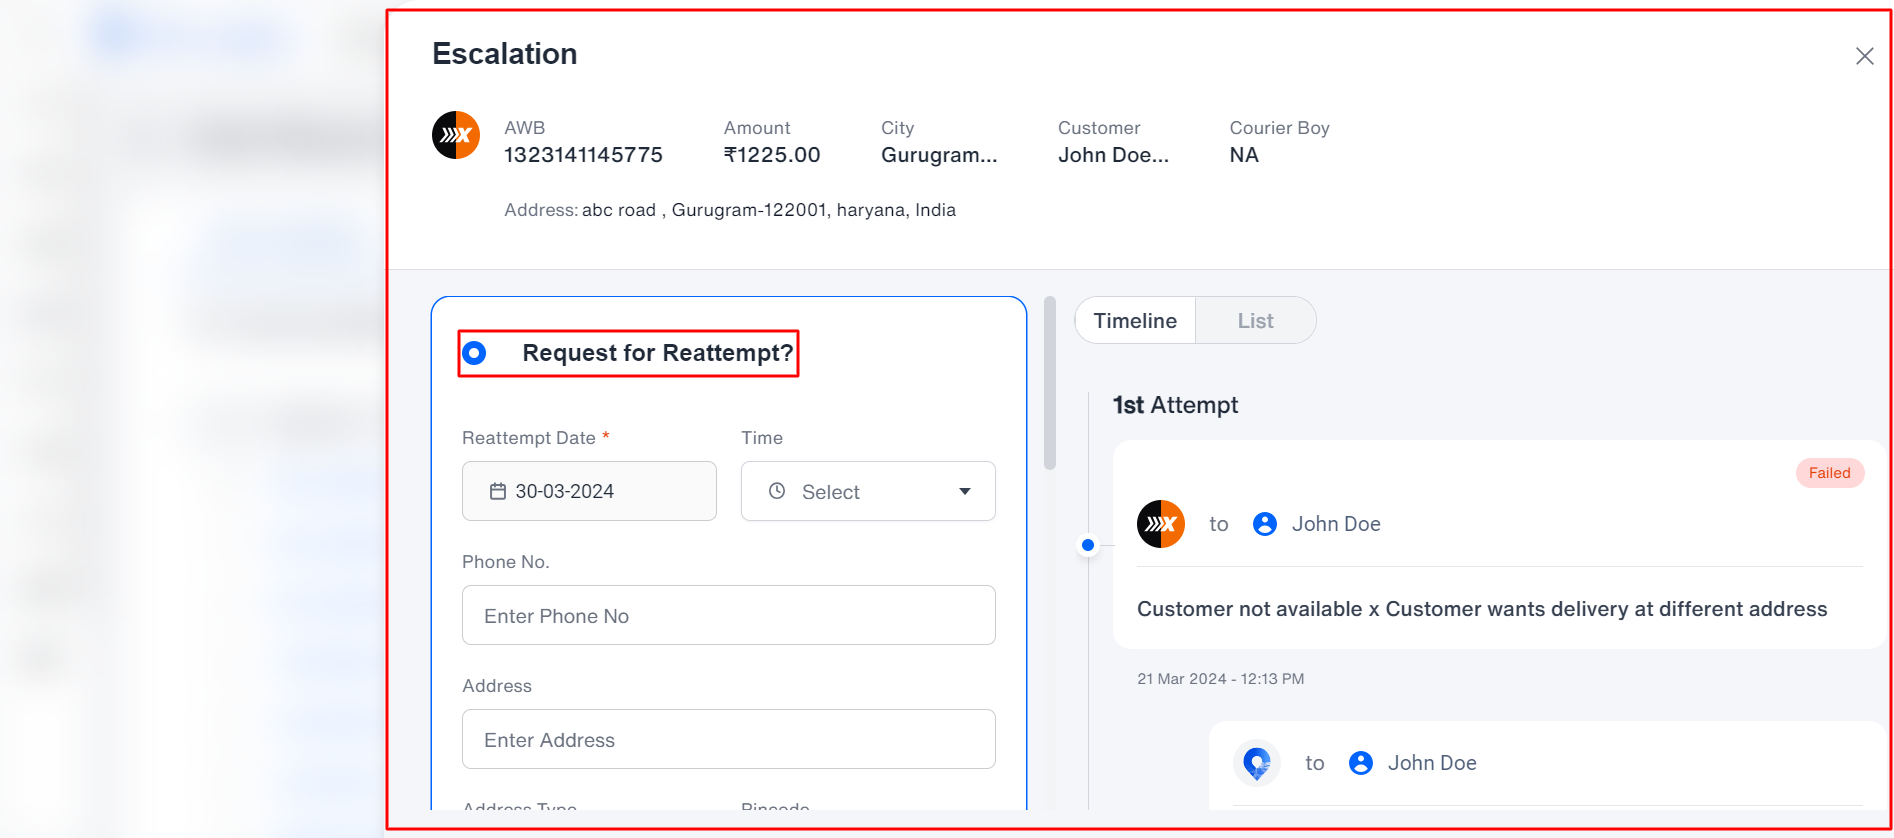
You can reattempt an order by filling out the details below.
- Reattempt date: Enter the date you attempt to deliver the parcel.
- Time: Select the time to attempt the parcel for that selected time at the customer's end.
- Address: Enter the address if there is a correction or change in the address
- Address type: Select the address type
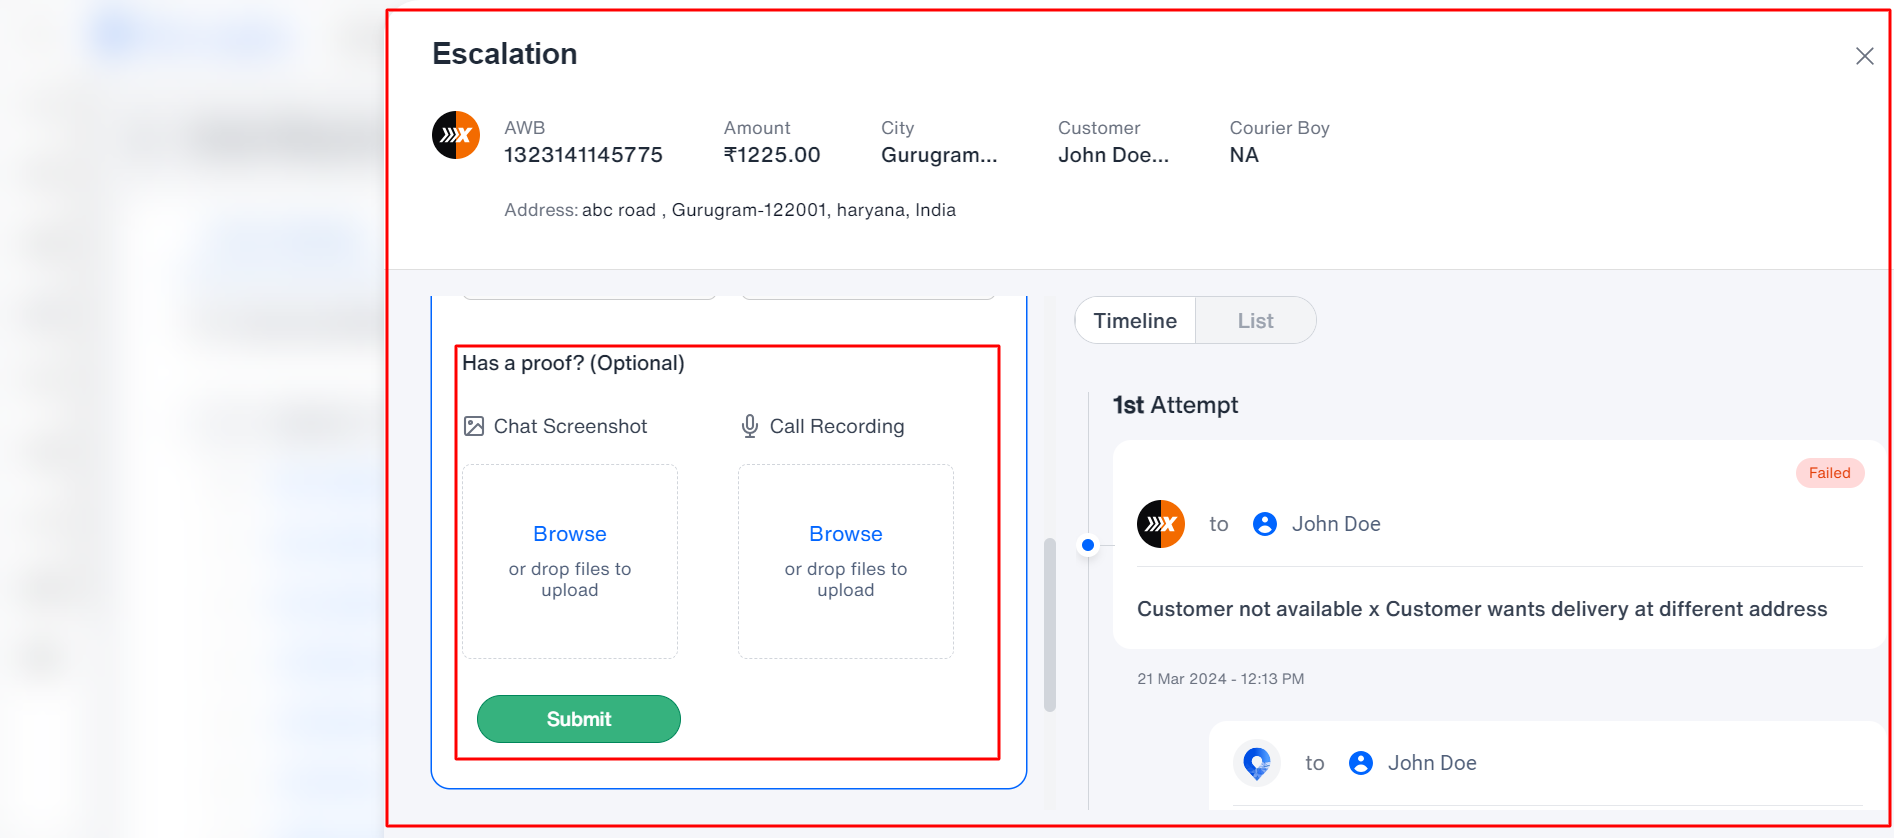
- Add media: Upload the conversation via screenshot or the call recording.
- RTO: Return to Origin: To make an RTO, select the RTO option, enter your remark, and click the submit button.
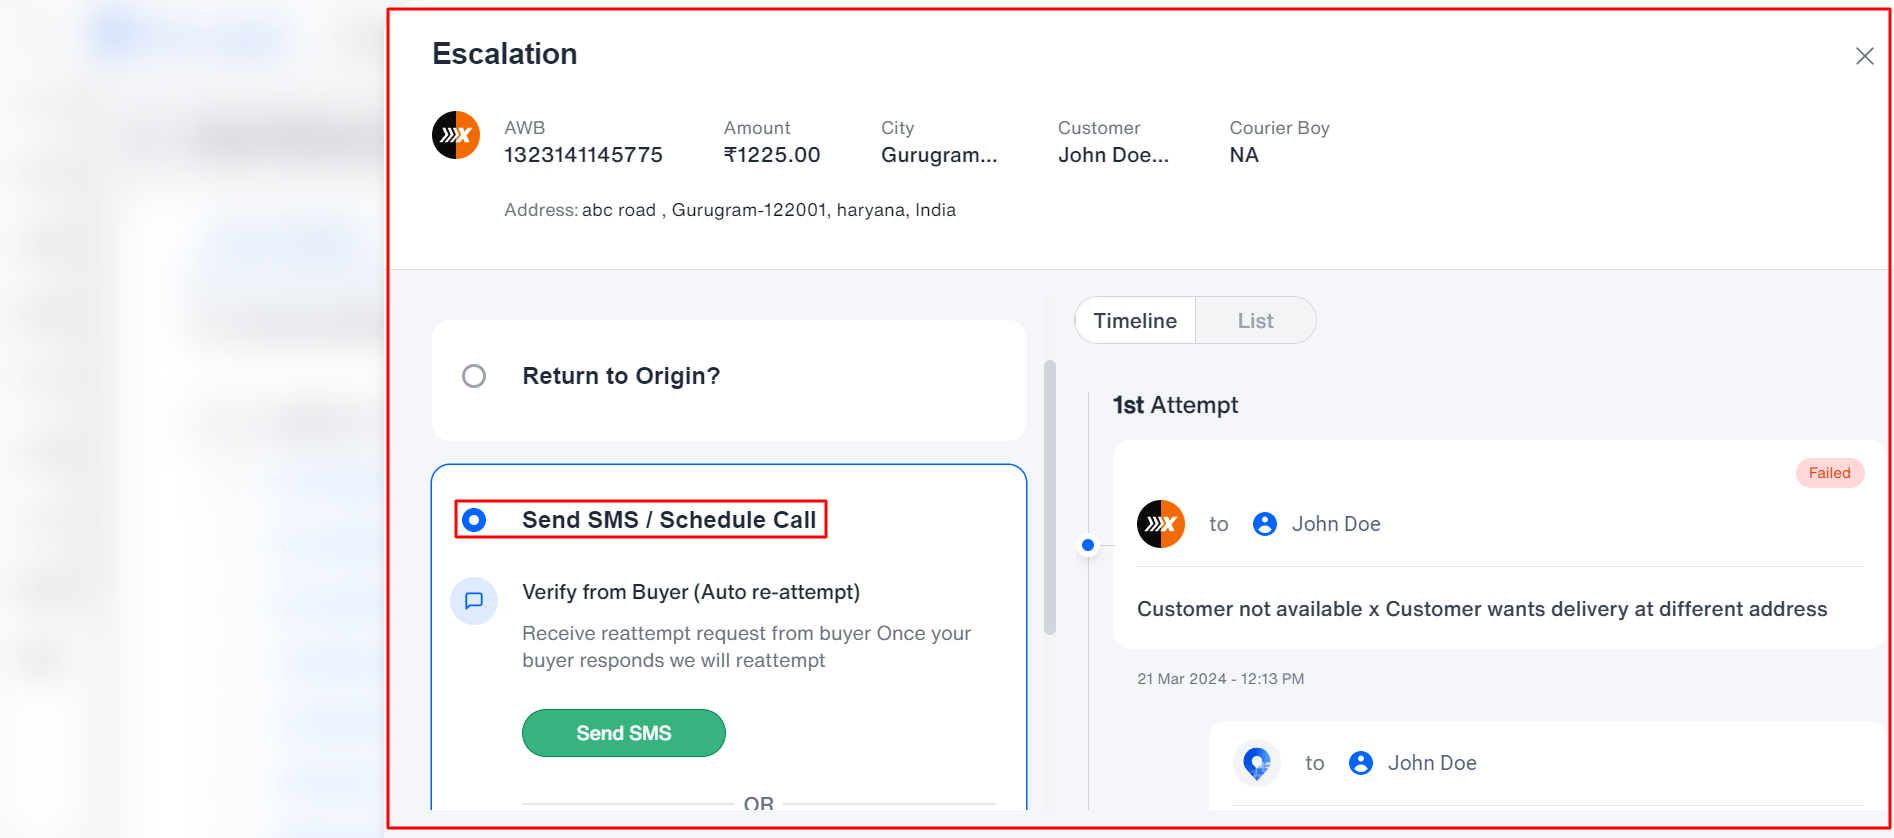
- Send SMS/Schedule Call: You can attempt the order delivery at the buyer's end via SMS or by calling.
- SMS: One SMS will be sent to the buyer regarding order delivery by clicking the SMS option.
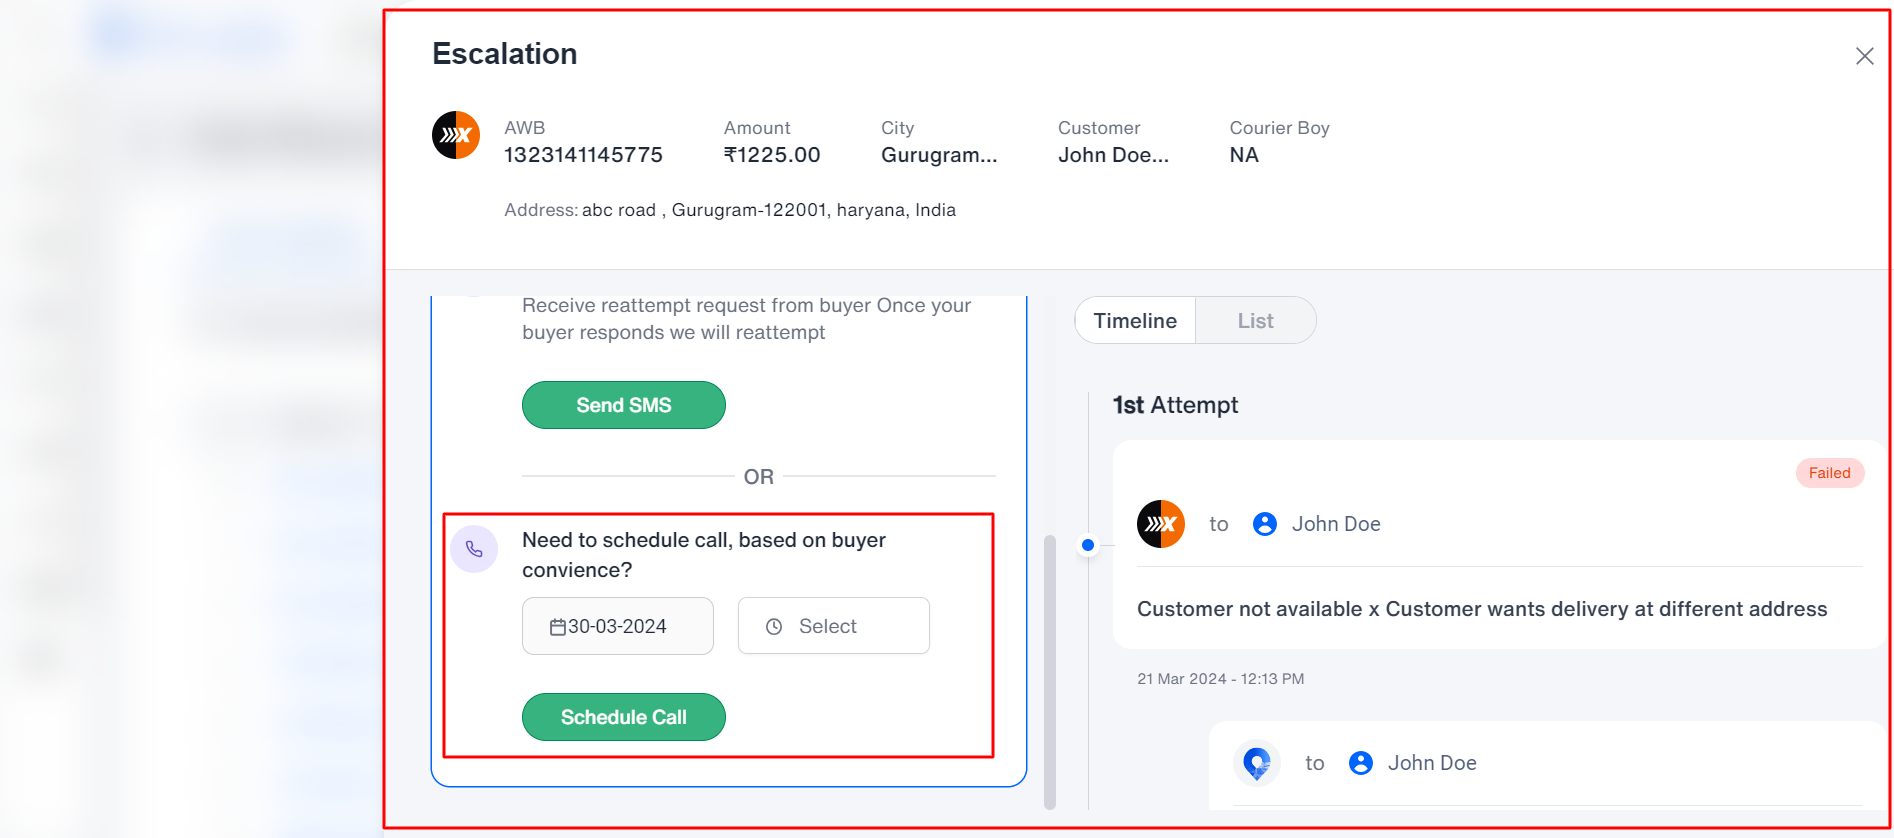
- Call: By selecting the date and time, an automated call can be scheduled for the buyer regarding the order delivery.
On the right side, it has the timeline and list view
- Timeline view: A simple flow where you can check the journey for the parcel starting from the first attempt. You can view the attempts count and the courier service used for the order.

Courier service for the customer: Delivery attempt counts along with the remark of whether a call has been received or the reason for the undelivered of the order can be seen.
The exact order will go under the non-delivered, where you or ithink the logistics team will follow up.
If iThink Logistics or the seller has followed up with the customer, either in any way, by call, WhatsApp, or SMS, the same data will be stored in the timeline records with the capture of date and time.
- List view: A simple flow based on the attempts with the date and time.
In the list view, you can view Actions raised by a person, Reason/remark, Actions taken by courier service, Attempts, Future delivery dates, if any, Sources, updated addresses, Updated phone numbers, if there are any, and proof of recording.
Note: Any action taken will be updated in the timeline and list view.